Javascript is disabled on your browser.
To view this site, you must enable JavaScript or upgrade to a JavaScript-capable browser.
Cameras
V-RAPTOR XL [X]
V-RAPTOR [X]
KOMODO-X
KOMODO
Solutions
Solutions
RED Connect
Shop
Shop All
Cameras
Accessories
Third Party Accessories
Gear
Dealers
Learn
Learn
Power of RED
Beyond Cinema
REDucation
RED Tools
Sample R3D Files
Shot on RED
Shot on RED
Stories & News
Behind the Look
KOMODO on Set
Awards
BTS
Media Kits
Support
Contact Us
Downloads
Help & FAQ
Developers
Service Centers
Sidebar
My Account
Shop
Shop All
Camera Brains
Accessories
Third Party Accessories
Gear
Learn
Learn
Power of RED
Beyond Cinema
REDucation
RED Tools
Sample R3D Files
Solutions
Shot on Red
Shot on Red
Awards
Behind the Look
KOMODO on Set
Stories
BTS
Media Kits
Locations
RED Locations
Dealers
Rental Houses
RED Studios Hollywood
RED London
Programs
Educational Program
Support
Contact Us
Downloads
Help & FAQ
Developers
Service Centers
Your cart is empty
Go
Red 101
Search
Color Management with Cinema
Understanding Sensor Crop Factors
Understanding Lens Vignetting
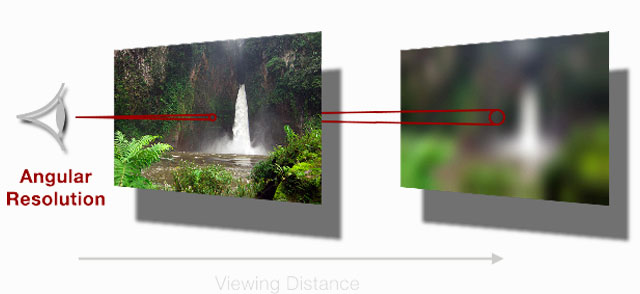
Human Eyesight & 4K Viewing
Global & Rolling Shutters
Temporal Aliasing with Cinema
Understanding Low Contrast Filters
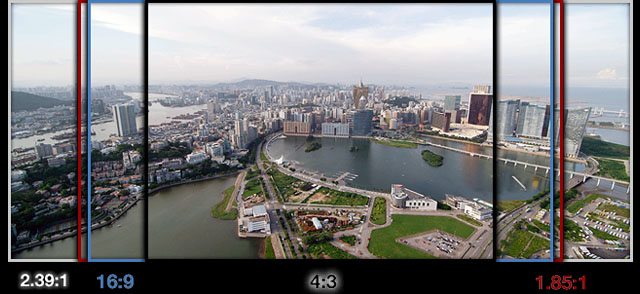
Video Aspect Ratios
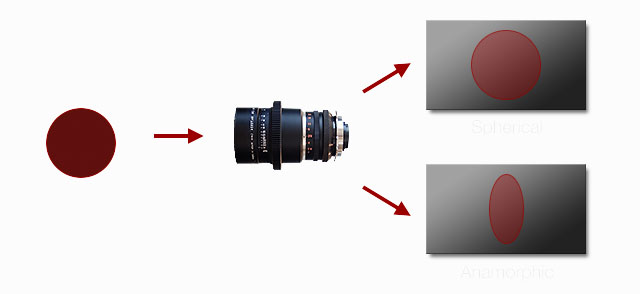
Understanding Anamorphic Lenses
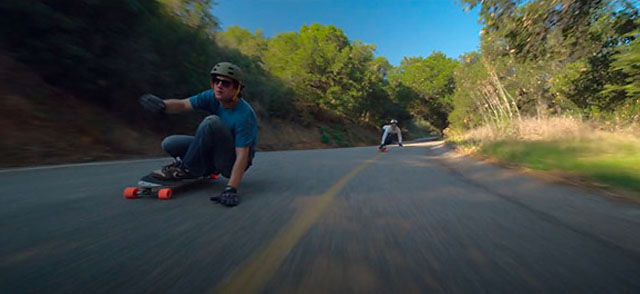
Panning Speed Best Practices
Exploring Infrared Cinematography
Understanding REDlogFilm and REDgamma
PAGE
1
2
3
of 3